CBOTB

Friday, January 29, 2016

Home Made Tactile Play


Kids love commercial moon sand- or kinetic sand, or cra-z-sand, depending on the brand you buy (and it can be expensive).  You can bury things in it and have kids find them, build with it, roll it out, flatten it, stamp it, use cut outs with it, etc.  I won't re invent the wheel as far as what you can do with it...here is a link to a previous post to help with that:
http://fabulousfriendsot.blogspot.com/2015/03/play-dough-and-tactile-play.html

You can make your own home made mood sand (and save yourself some money) using the following ingredients:
  • Flour
  • Canola (or vegetable) Oil
  • Food Coloring (although I would suggest paste vs. the liquid)
Ratio of 1:8=  1 cup oil for 8 cups flour (2 cups flour and 1/4 cup oil for a smaller batch)

Put oil in a large bowl, and add food coloring (at least 12+ drops, or use paste until you get a nice, dark color).


The oil and the food coloring will not mix well, but it still should be okay- again, paste would likely be better for a richer color.


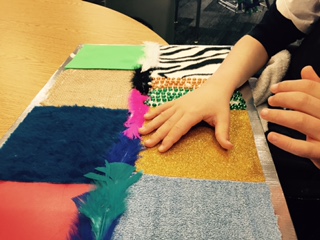
Home made soap mud (sometimes called ghost mud):
You will need:
  • bar of ivory soap
  • roll of toilet paper
  • cup of warm water

Here's the part that kids love:  
  • have them unroll the toilet paper roll (this can get a little wild)
  • put the bar of ivory soap in the microwave for about 1 minute and 20 seconds.  Have you ever done this before?  If not, it is pretty cool~ this is what happens to the soap:
Prior to putting the bar into the microwave, I let the kids look at the bar of soap, smell it, and feel/hold the bar so that they would see how it had transformed after I took it out of the microwave.
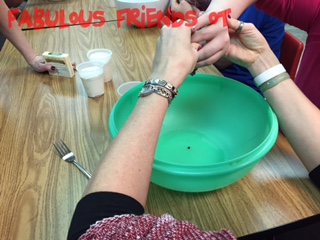
  • Once the soap is cool (doesn't take long), have the kids crumble it up into a large container (good bilateral activity), and then add the water.  Mix it up.
  • Have the kids shred the toilet paper up (another good bilateral activity), and add it to the soap/water mixture.
This can be quite a large chore- this activity is a good group activity for that very reason.

  • Mix it all together well, using your hands.  This takes some work.  Add very small amounts of water as needed (there are different plies of toilet paper, so depending on what brand or size you use, you may need to add more water).


It will get to the point where you can mold it.  Roll it in a ball, build a snowman with it, or have the kids come up with their own creations.

Tuesday, January 19, 2016

DIY Tactile Board


Some textures on my board: a piece of plastic notebook cover, fuzzy fabric, burlap, foam piece, terry cloth, glitter foam, beads, fleece, and feathers

I have some kids on my caseload who developmentally are not at the grasping stage due to multiple/significant disabilities (although chronologically they are way past that developmental stage).  These kids do not get much tactile/sensory input to their hands or use their hands for exploring.  You can provide them with more exposure to tactile input and encourage active exploration with their hands by make a tactile board.  This is something that you can make yourself by adhering various textures of cloth/items that you have lying around to a foam poster board.

I started by finding pieces of cloth and various textured items- I cut them into squares and glued them to a piece of foam board using Gorilla Glue http://www.gorillatough.com/index.php?page=store-locator&gclid=CP3X0LPmtsoCFYVFaQodthgE3Q.  Why Gorilla Glue?  Because I seem to have more luck with things adhering with Gorilla Glue vs. school glue, craft glue or use of a glue gun.  As Gorilla Glue dries, it expands.

Adding some eye catching colors can encourage tracking and visual fixation as well as reaching toward a preferred texture-  this particular student of mine is drawn to metallic/shiny things.  Of course you want to be careful what you adhere to the board, especially if you have someone who mouths things or puts things in their mouth if they should pull them off of the board.  Supervision is required for safety while your student is accessing the board for this reason.


You can present the board flat on the table top or at an incline.  You could also attach it to/hang it on a wall to make it a vertical surface to explore.  You could also make less squares or make the tactile squares interchangeable with velcro so that you can move the textures around.  Mine are stationary.

My student began by exploring with one hand only-
Soon he began adding his other hand to the board- and kept his fingers out of his mouth.
I put some metallic duct tape around the perimeter of the board as well.

Saturday, January 9, 2016

How playing an instrument benefits your brain - Anita Collins


I am a firm believer than having strong laterality skills significantly impacts motor skills.  Getting those 2 sides of the brain firing and working together really influences the brain and body, which is why I think this video is so fabulous~